 The Asus VivoBook X202E touchscreen laptop is an excellent value Windows 8 ultraportable notebook. With a street price of around $499, this three pound Intel Core i3 powered computer goes far beyond the specs of a netbook but yet has a compact 11.6" screen and similar dimensions of one. Given its competitive price point, a traditional 500GB hard disk is to be expected, but wouldn't it be great to upgrade that to a lightning fast SSD?
Before reading any further, please note that if you follow this guide then you do so entirely at your own risk. Asus does not provide instructions for opening the X202E / S200E / Q200E and you could easily damage your laptop by attempting this procedure or invalidate your warranty.
One other important note is that this laptop requires a 7mm 2.5" hard drive / SSD rather than the more common 9.5mm 2.5" hard drive size.
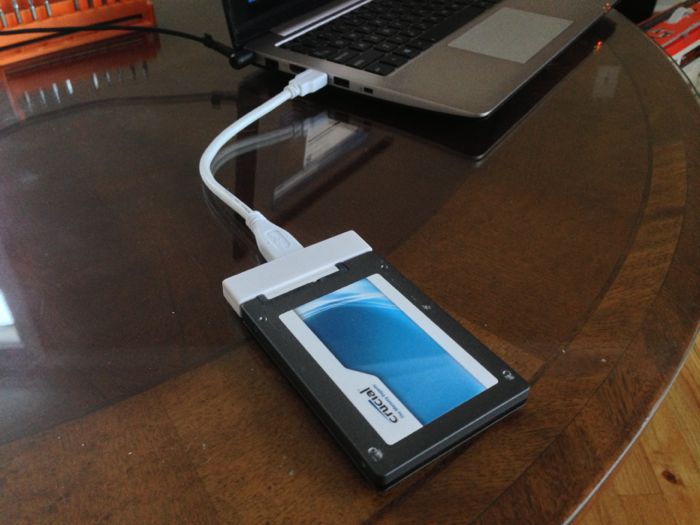 So with that said, here's what I encountered when I upgraded the hard disk in my X202E-DH31T to an SSD. I'm primarily going to focus on how to get the original hard drive out and fit the new SSD, because it seems that many people have been struggling with how to open up the X202E. The drive cloning process itself is similar to how it would be done on any laptop using one of the various software tools for doing the cloning. I'm going to assume that you have already cloned the existing hard drive onto the new SSD by connecting the new SSD using a USB 2.0 or 3.0 connector or enclosure as shown in the photo.
Opening up the Asus X202E / S200E / Q200E
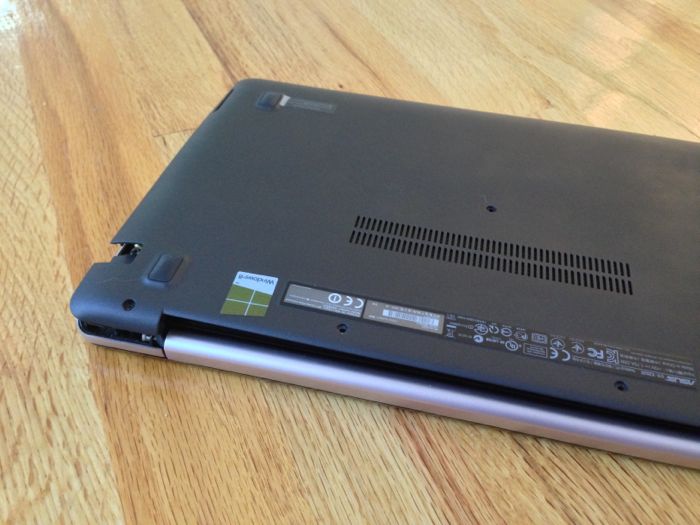
Start by turning the X202E over and unscrew the nine screws on the underside. Place the screws safely aside. When I unscrew laptop covers I tend to arrange the screws to mirror how they came out so I know exactly which screw goes into which hole in case some are longer or differently proportioned than others.
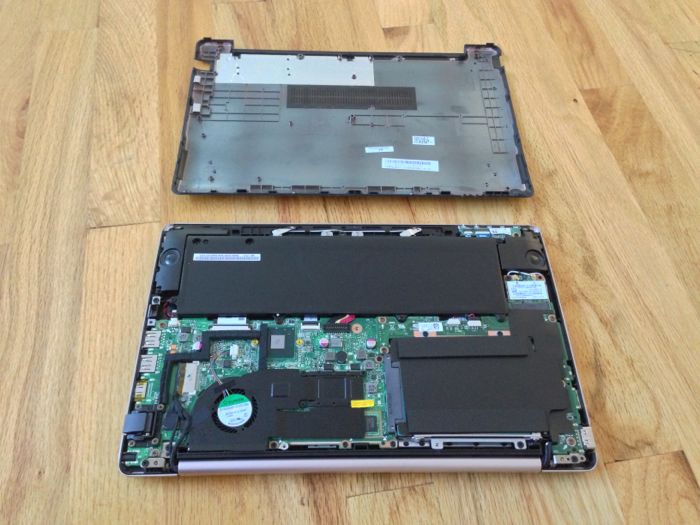
Now pry open the bottom cover where it meets the rear hinge. Be gentle, it's made of plastic and plastic can easily snap.
Once you've made a slight opening, continue to the rear corner and then along the side. Then do the same to the other rear corner and along the other side.
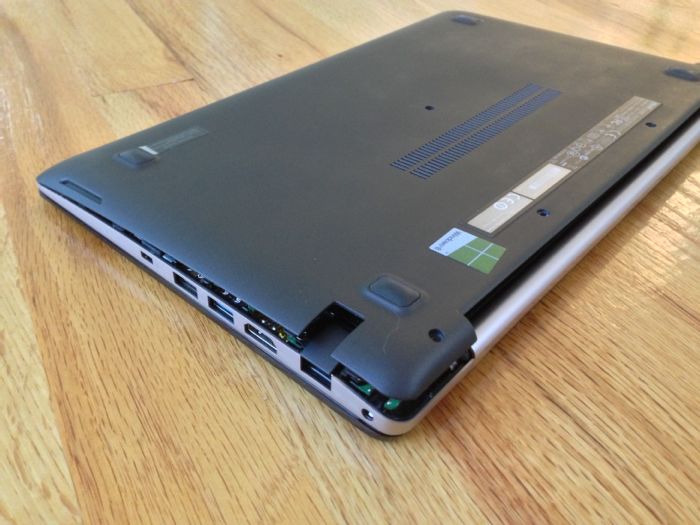
When that's fully done, the cover will angle upwards like the hood of a car. At the correct angle it will disengage naturally from the front of the laptop and can be pulled away.
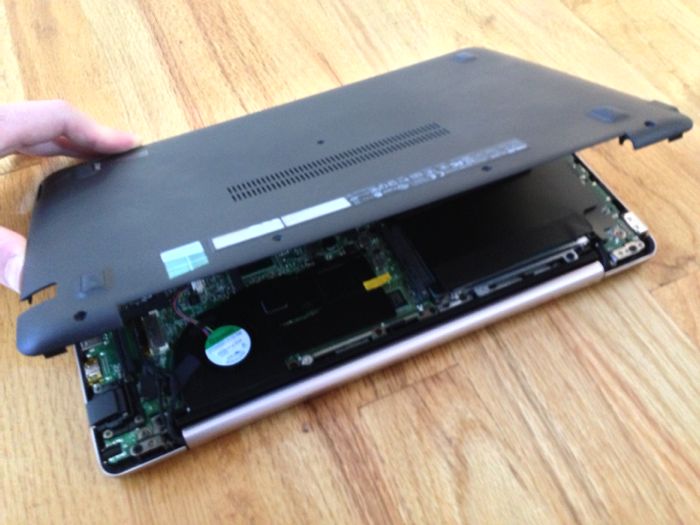
At one corner you can see the hard drive with screws holding it down and a plastic removal tab. If you were thinking also of upgrading the memory in your X202E, you may have noticed in the photo that there are no accessible RAM slots. Asus soldered the memory directly onto the motherboard. ReadyBoost anyone?
Although there are four screw holes for securing the hard drive housing, my X202E only had three screws fitted. Unscrew these and set them safely aside.
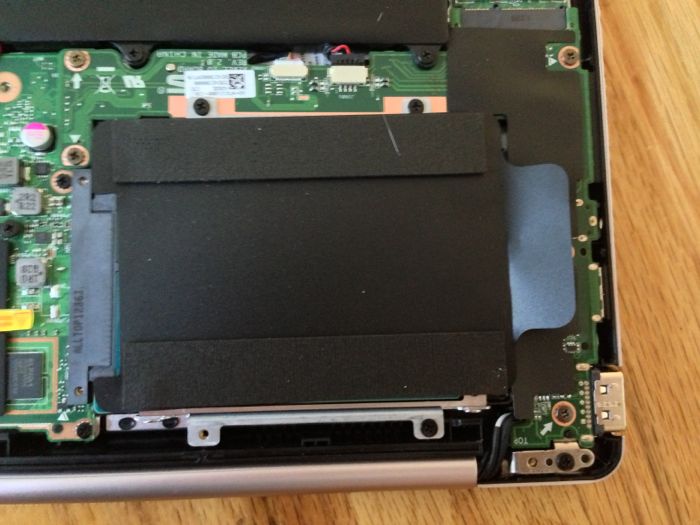
Now pull the plastic tab on the drive housing gently towards of the side of the laptop. The drive housing should disengage from the SATA data and power connector and can be removed.
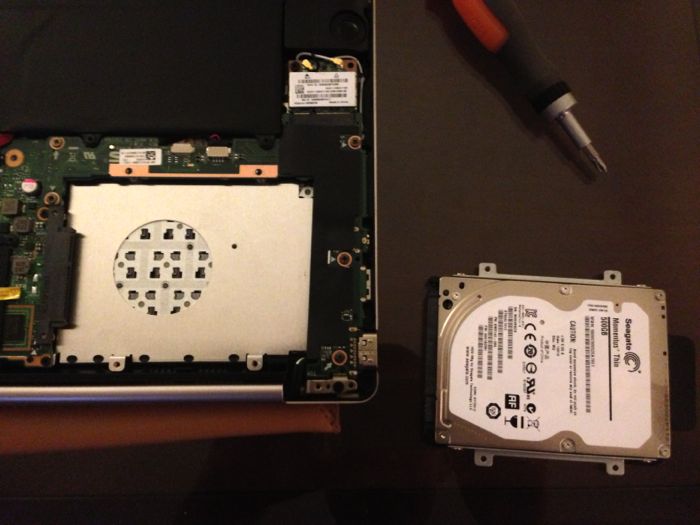
Then unscrew the screws on the side of the drive housing to remove the hard disk and put your new SSD or new hard disk into the housing.
Follow the above steps in the opposite order to screw everything back together. When replacing the bottom cover, start with the front and then gently push it down at the sides until you hear the internal pastic clasps click into position. Finally push down the section at the rear next to the hinge.
If your drive cloning software did its job, and you correctly fitted the new SSD, then you should now be able to boot up your X202E / S200E / Q200E and enjoy a much faster laptop!
Good luck!
Neil Berman, Helper-in-Chief, TheONbutton
